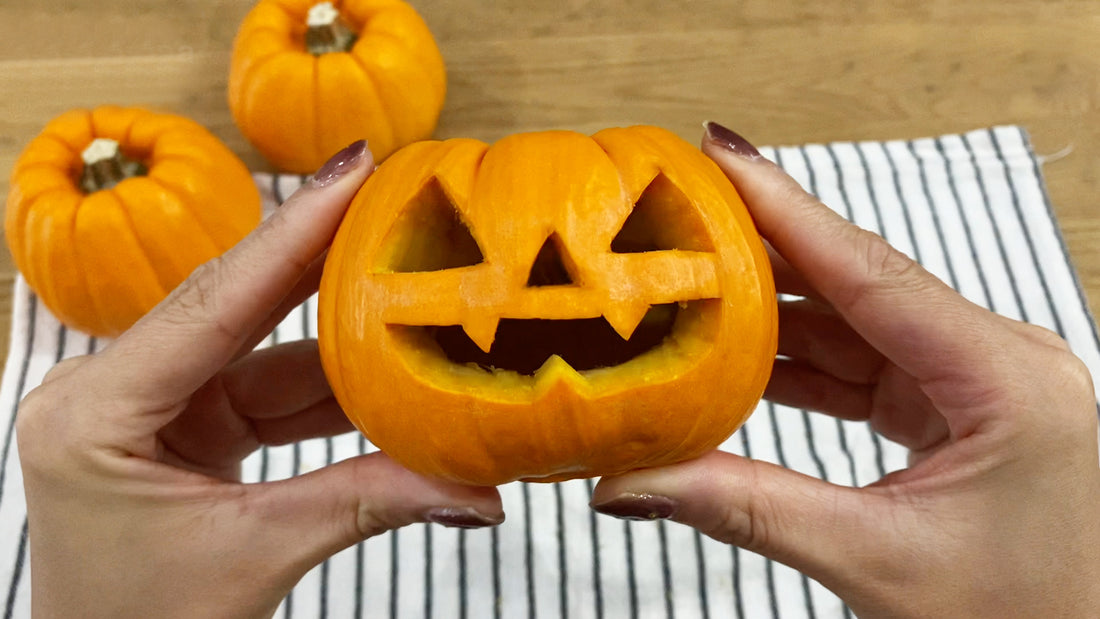

Make it with a real pumpkin!
Jack-o'-lantern
Speaking of autumn events, Halloween is the first thing that comes to mind!
I'm sure many people enjoy dressing up in costumes and decorating pumpkins.This time, we will show you how to make a Jack-o'-lantern, an essential item for Halloween.
①What is a Jack-o'-Lantern?
Jack-o'-lanterns are decorations used on Halloween to scare away evil spirits.
Why not try your hand at making your own original jack-o'-lantern to get into the Halloween spirit?
②Things to prepare

What you need to prepare:
Toy pumpkins about 10cm in diameter are sold at flower shops and supermarkets.
Pumpkin carving cutter,
This is a cooking cutter I bought at a 100 yen shop.
A spoon to hollow out the pumpkin,
A pen for drawing faces.
It's a good idea to bring bags and newspapers to throw away your trash.
③Select a pumpkin

Choose your favorite pumpkin.
Each one has its own unique personality, so it's difficult to choose.
This time I decided on this pumpkin.
④Draw a face

Draw a face on the pumpkin.
Draw any face you like while keeping an eye on the balance.
If you draw too much detail it will be difficult to carve, so if you are a beginner we recommend a simple face.

Smaller children can also use paper templates to attach the pieces.
⑤ Hollow out the inside
Use a cooking cutter to hollow out the inside of the pumpkin.
First, carve out a circle at the bottom of the pumpkin.
If it is too small, it will be difficult to work with it afterwards, so a diameter of about 4 to 5 cm is a good guideline. 
First, make a thin cut...
Please work with the utmost care to avoid injury.
Children must always work alongside an adult. 
When you hollow out the bottom, you'll find a ton of seeds inside! 
Next, we'll cut this part out neatly.
Please be careful not to injure yourself while doing this.
Remove all the seeds with a spoon.
I can't get it at all.

...Struggling...
The seeds and pumpkin fibers get tangled and are difficult to remove, but it's a task that even children can do, so please give it a try. 
This is what it looks like when you hollow it out!
⑥ Carving the face
Next we will carve the face.
This is delicate work, so be careful.
We proceed with the carving little by little, being careful not to injure ourselves.
Make sure to carve out the area so that no lines drawn with the pen remain.
The pumpkins are small, so children should always work with an adult. 
This is how I carved the eyes, nose and mouth!
Next, clean up any fine fibers on the cut surface.

This is what it looks like when cleaned.
Once you have finished carving the pumpkin, rinse it thoroughly with water. 
After washing the pumpkin, thoroughly wipe off the water with kitchen paper and it's done!!

This time I was able to make it in about 30 minutes!
It's easy, so please try it at home.
*Carved pumpkins will dry out and wrinkle after a few days, so it's best to make them 2-3 days before Halloween.
Author: Nakanishi Edited by: Kambara


